


The Ultimate Waxed Suede Tutorial
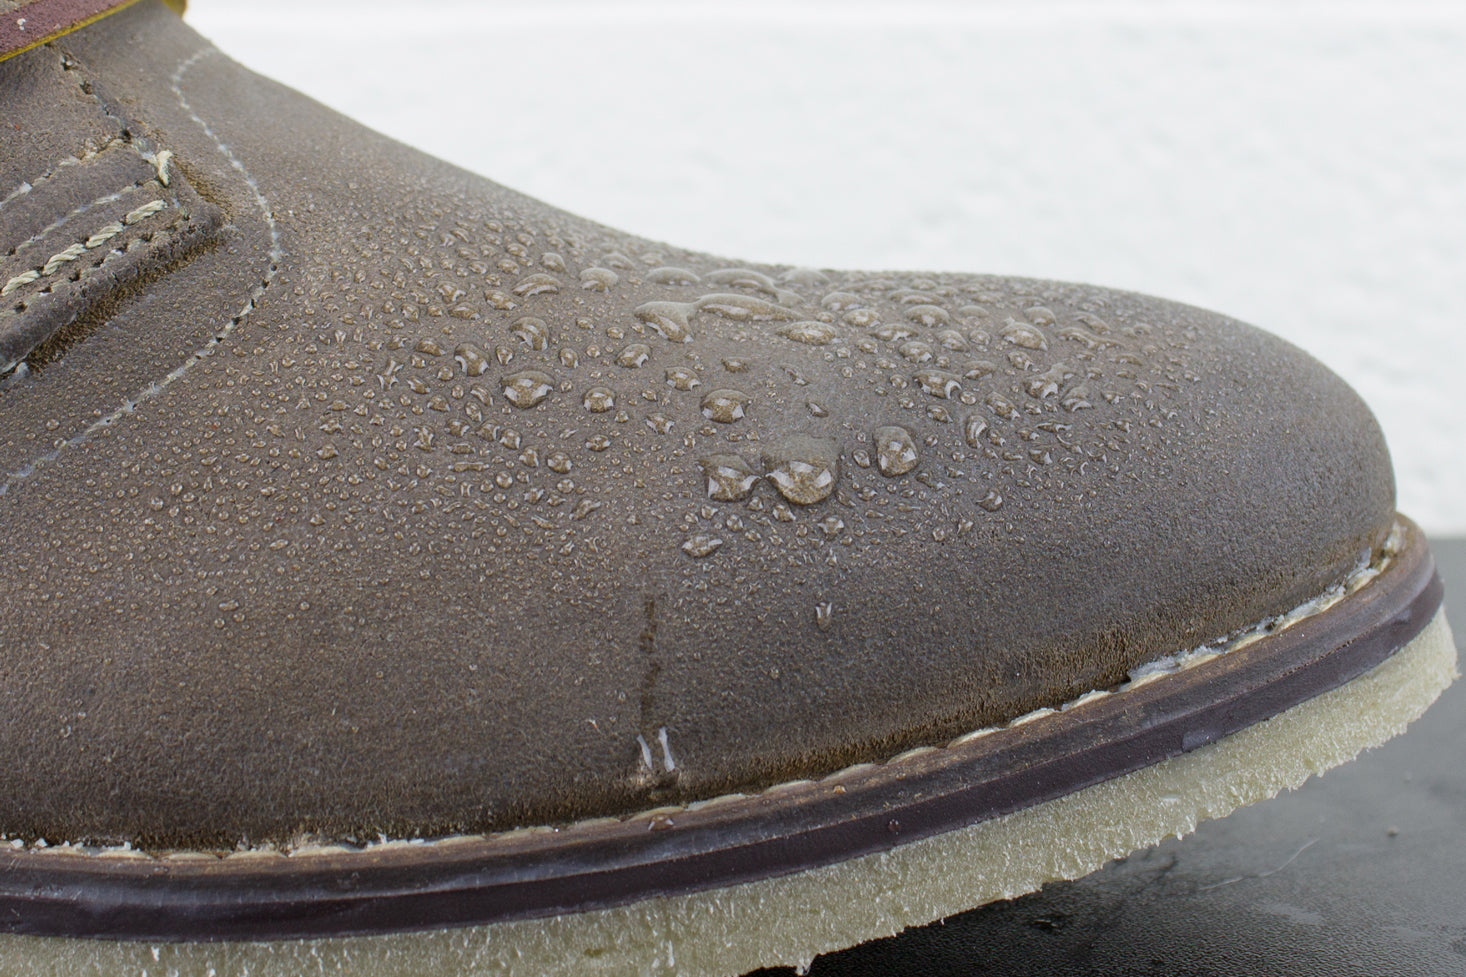
This tutorial is a little different than what we've done in the past since we're actually going to be using our Heavy Duty Fabric Wax on sueded leather. Truth be told, suede is one of my favorite things to wax because it's going to add a ton of character while also improving on function by making them waterproof. Before we get down to the waxing, it's important to highlight some things about suede that make it different from other types of leather.
 During processing, thick cowhides are typically sliced down to three "splits", consisting of top-grain, interior, and underside. While the first two splits are processed into leather that's finished to be all smooth and shiny, the underside split is what's used to make our suede. Just like our own skin, the outer layers of cowhide are tougher than the new skin underneath, which is why these layers are usually used to make firmer, more rigid leathers. In contrast, the underside layer used to make suede has a lot more flexibility, making it ideal for when comfort is a priority. Think of it this way, a black motorcycle jacket made with top-grain leather is usually going to weigh a ton and be really stiff before it's broken in, while a suede jacket is going to be relatively light and flexible right from the start. In addition to all this, suedes have varying degrees of "nap" (the little hairs that stick out from the leather). The length of the nap depends on how it's processed and is usually a good indicator of quality. A really short nap is going to be more expensive, but will have a great 'velvety' appearance.
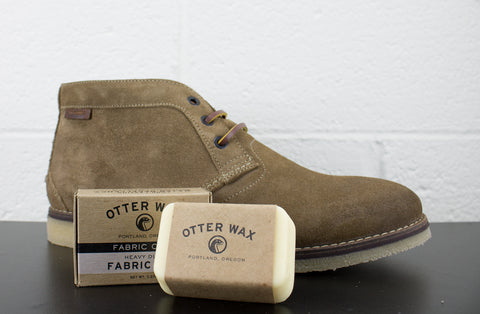
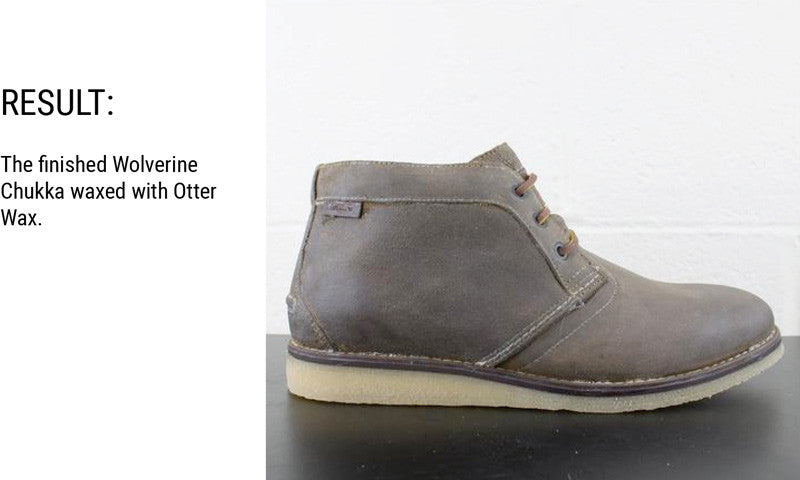
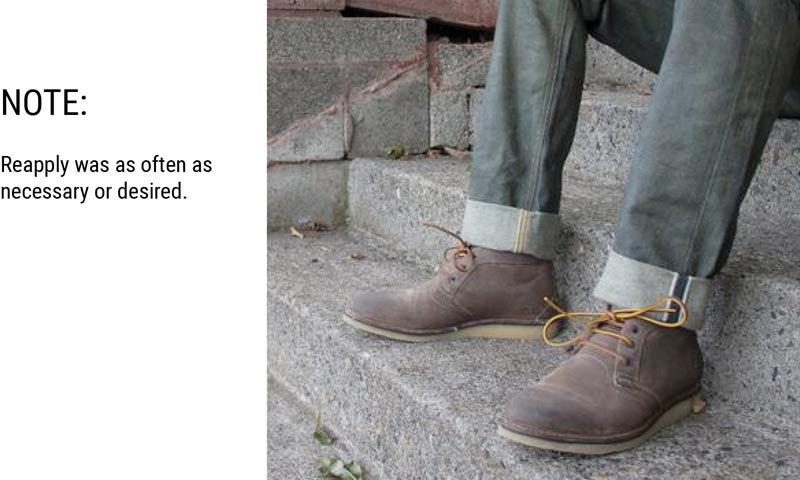
For this tutorial, we'll be waxing a pair of suede 1883 Wolverine Men's Chukkas.
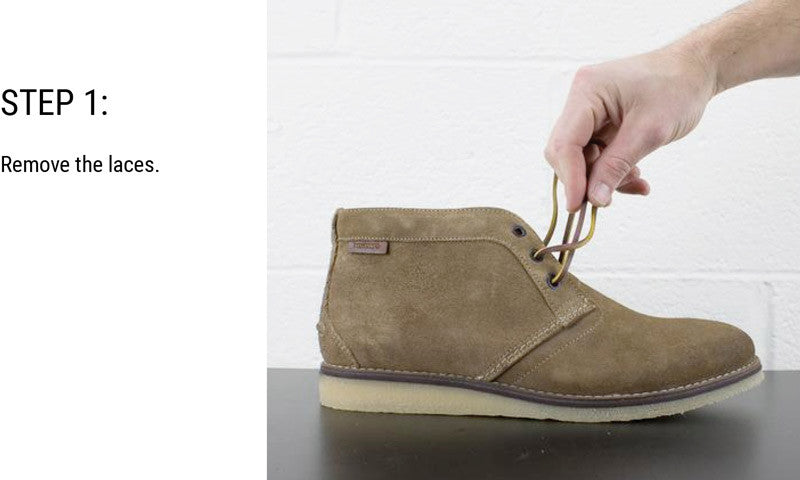
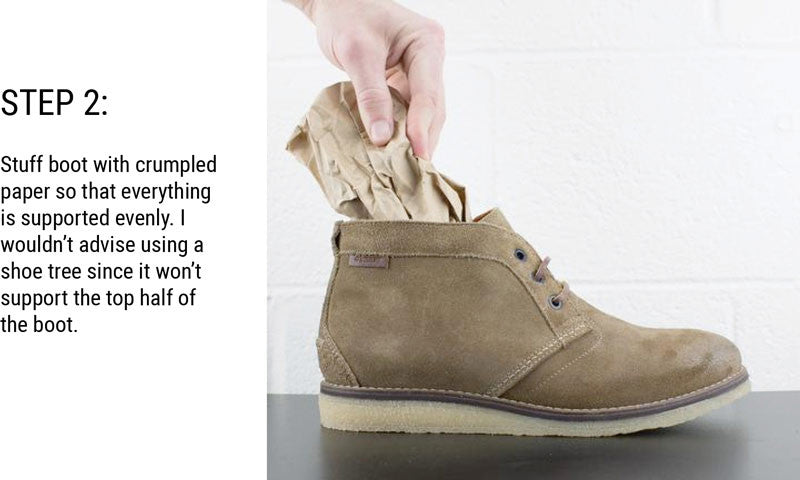
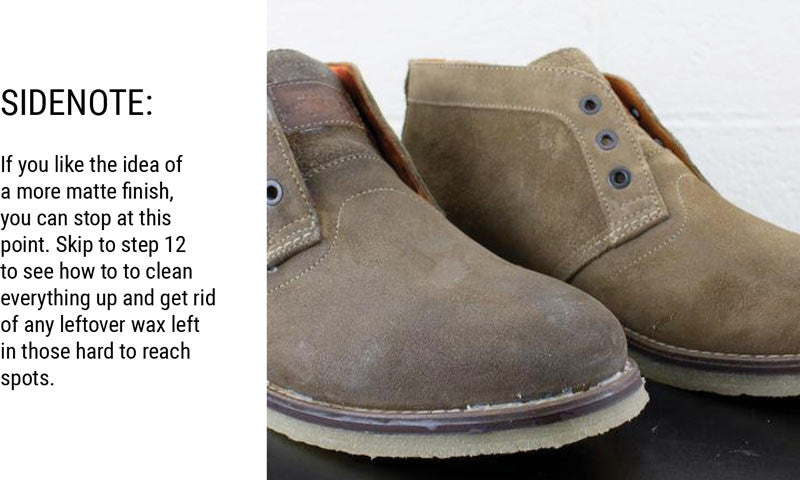
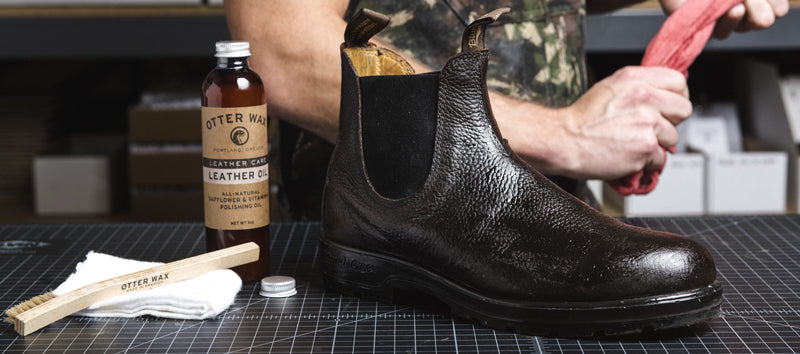
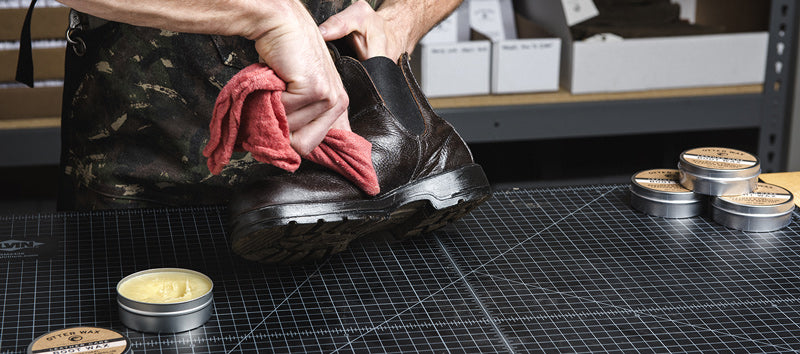
Applying our Heavy Duty Fabric Wax to suede is relatively straight forward project, however I've thrown in a couple of optional steps depending on what look you want to achieve. From start to finish this project took about 30 minutes, and used up about 3/4 of one of our Regular Size Otter Wax bars.
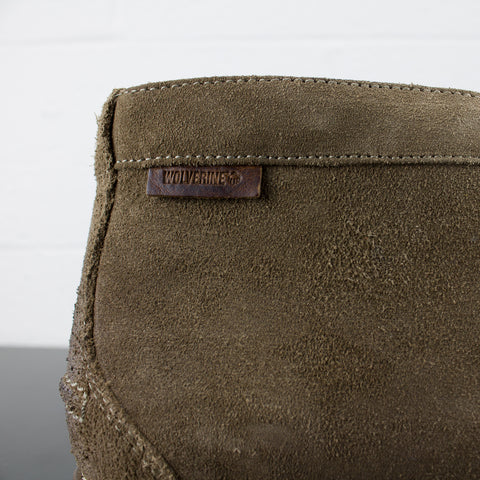
I'd say the suede has a medium nap, but the top part of the boot seems to be made with slightly higher grade. It doesn't really matter though, since the wax we'll be applying is going to lay all of those leather fibers down. One of the things I really like about finishing suede with our wax is how it will take on the appearance of a smooth patent leather, but there's still some degree of texture left, giving it a much more natural look. Wolverine lists the color as Crepe, but they're almost a medium brown. Once waxed, they will darken up considerably.


Written by Otter Wax